Being engaged in agricultural technology of tomatoes, many farmers pay attention to those varieties of crops that have not only good yields, but also pleasing with minimal care for them. Such unpretentious tomatoes are the fruits of the varietal group Nepas.
Grade description
Nepas tomatoes make up a group of more than ten non-deserving hybrids, including:
- Pink;
- Striped;
- Red with a nose;
- Crimson;
- Giant Greyhound;
- Salting;
- Cherry-shaped (cherry);
- Indoor (decorative);
- Canning;
- Orange heart-shaped;
- Plum-like;
- Scarlet and others.
The fruits of the entire series are distinguished by good fruiting and a neat appearance.
Here are some general characteristics of hybrids of the variety in question:- compact, stocky bush (20–90 cm in height), which does not require a garter, since its brushes can withstand up to 7 fruits weighing up to 300 g at once;
- due to the compactness of the bushes, there is the possibility of increasing the yield without resorting to the expansion of the beds;
- garden culture differs in frost resistance and unpretentiousness in leaving;
- a small number of stepsons and a special structure of the stems of the bush allow the plant to be better ventilated, so indoor and garden varieties are not exposed to late blight and the development of pathogenic bacteria;
- all group hybrids have a yield of 5–6 kg of fruit per 1 m²;

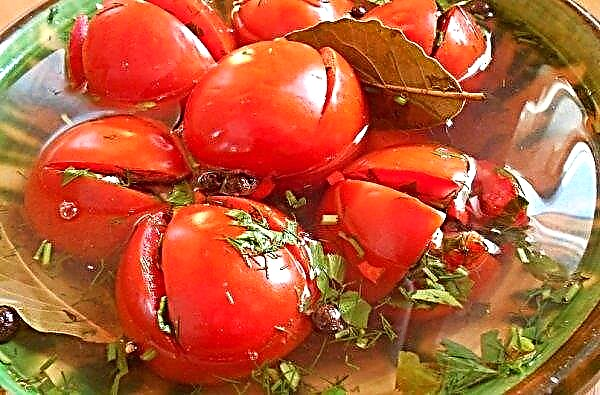
- tomatoes of the entire series are consumed fresh, and also from them can be harvested for the winter, canned, prepared homemade tomato paste or pickled;
- fairly rapid fruiting - after 80-100 days;
- hybrids are suitable for agricultural technology on an open bed, where they can be tied to supports, as well as in a greenhouse.
Advantages and disadvantages
- The indisputable advantages of the Nepas tomato group are:
- lack of pinching;
- compact bushes;
- undemanding care;
- resistance to weather extremes and temperature surges;
- early ripening of tomatoes;
- resistance to "tomato" diseases and parasites;
- good taste of the fruit;
- cultivation both in open land and in a greenhouse;
- high productivity.
- Minor flaws of the variety can be considered:
- small sizes of fruits;
- no bright saturated sweet taste;
- planting irrigation is recommended exclusively with warm water;
- Seeds should only be purchased from trusted manufacturers.
Self-growing seedlings at home
To grow Nepas tomato seedlings at home, you need certain knowledge regarding the optimal timing of planting crops, as well as activities related to the direct sowing of seeds and caring for seedlings.
The timing
The most favorable time for sowing seed material is considered to be the time interval from the last February decade to the second week of March. It is important to take into account the region where agricultural culture is carried out, as well as where it will be grown (in a greenhouse, greenhouse or open ground). While waiting for early spring, seeds are sown in February. In regions with usually cold spring, prolonging its arrival, sowing is carried out in the last March decade or in the first week of April.
Did you know? In some countries, tomatoes are called apples: for example, in France they are “apples of love”, and in Germany they are “paradise apples”.
The soil
Soil for sowing tomato seeds is bought in specialized stores (it will already be prepared with the substances necessary for the culture) or prepared personally. For this purpose, it is harvested in the fall, and then stored directly on the street in a bag of polyethylene or in a wooden box. This will allow the soil to freeze, which will save it from pathogenic bacteria. You can also disinfect the soil by spilling it with a solution of potassium permanganate or by calcining it in the oven to + 80 ° C.
The earthen mixture for sowing seeds should include (proportion - 1: 1: 1):
- sifted compost;
- humus;
- forest land (or purchased soil).
- 2 glasses of ash;
- 3 tbsp. l (60 g) superphosphate;
- 1 tbsp. (20 g) potassium sulfate.
Important! A complex fertilizer must be added to a home-made soil mixture. A weak solution of this fertilizer also needs to be watered periodically by young plants.
Capacity for growing
The prepared and decontaminated soil mixture must be divided into separate tanks.
To do this, you can use:
- boxes or special containers for seedlings;
- peat pots;
- paper or plastic glasses.
New containers used for sowing seeds must be rinsed with boiling water, and old ones should be thoroughly washed and disinfected. At the bottom of each tank, you need to make holes for the outflow of excess fluid.

Seed preparation
The seed material of tomatoes must be prepared for sowing in the soil - this will allow you to get strong seedlings that will take root without problems and bring rich harvests.
Prepare the seeds with a few manipulations:- Calibrating. First, seeds need to be inspected for damage, while discarding specimens with spots, signs of decay and selecting the largest ones for planting.
- Disinfection by heat treatment. For this procedure, they take a wide thermos flask, in which they put seeds wrapped in a piece of cloth and tied them up and fill them with water with a temperature not exceeding + 50 ° С. Then the thermos is closed and the seeds are kept in it for no more than 30 minutes. After this procedure, the seeds wrapped in tissue need to be cooled for two minutes in tap water. Such disinfection helps seeds to get rid of various fungal, viral and bacterial pathogens.
- Checking for germination. A week before sowing the seeds, they need to be checked for germination: take 10-15 pcs., Wrap them in a damp cloth moistened with a solution of growth stimulant, put the bundle in a container and place in a warm place. "Waking up" seeds will be suitable for sowing.

Sowing seeds
Sown seeds of non-spreading tomatoes according to the following technology:
- Place a drainage of small pebbles or pieces of egg shells at the bottom of each container for planting seeds.
- Lay the soil mixture on the drainage and pour it with heated water.
- Sew shallow (1 cm) holes for seeds in the soil mixture.
- Dip 1 seed into the wells and moisten the soil with a sprayer again, and then sprinkle the hole with loose soil.
- Cover the containers with foil to create greenhouse conditions and place them in a warm room.
Important! When tomato seedlings appear 5–6 sheets, the lowest leaves on the shoots must be removed - this will help to avoid stretching the bushes.
Seedling Care
A week after sowing the seeds, the first sprouts will appear, after which the containers are put on bright window sills.
In order for the seedlings to grow and develop well without delay, she needs to create comfortable conditions:
- Temperature. Seeds begin to germinate faster if the containers are kept at a temperature of + 25 ° C. When the first leaves appear, the temperature should be reduced to + 18 ... + 20 ° C during the day and + 16 ° C at night.
- Lighting. Seedlings need a 16-hour light day, which can be provided by illuminating a phytolamp. Direct sunlight should not be allowed to enter the sprouts, since this will affect them destructively. Significant shading of seedlings is also unacceptable - this will lead to its overgrowing and stretching. The most optimal solution would be lighting seedlings with scattered sunlight.
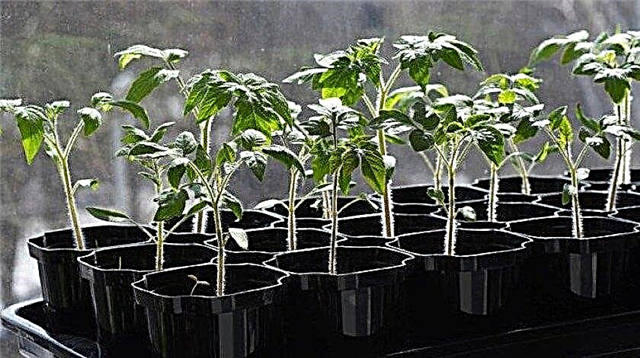
- Watering. Before picking, young plants do not water abundantly, but only maintain the necessary moisture with a frequency of watering once a week. Spraying with warm, settled water is welcome. Fortified seedlings are watered only under the root, without contact with the leaves.
- Top dressing. Since tomato seedlings grow for a certain period of time on a window in a small volume of soil, the lower leaves may turn yellow and crumble. The reason is a lack of nutrients. To avoid this, young plants need top dressing.
Fertilizers can be either ready-made complex fertilizers or aqueous solutions: potassium sulfate (12 g × 10 l), urea (4 g × 10 l) or superphosphate (35 g × 10 l). Before top dressing, it is necessary to water the seedlings.
Schedule top dressing seedlings:
- First the nutrient mixture is introduced 10 days after the dive.
- Second - after 2 weeks, then - every 2 weeks, until the seedlings are planted in the garden.
Important! During the hardening procedure, direct sunlight should not be allowed to fall on the plants, but it is better to place them in partial shade. These manipulations will help the seedlings to quickly adapt to the environment when the time comes to transplant to the garden.
Seedling hardening
Before planting unsweetened tomatoes on an open bed, seedlings need to be hardened:
- For the first time, hardening of tomato shoots is carried out 3-4 days after germination. Within 5-7 days, the air temperature in the room is lowered: in the daytime - from + 18 ° С to + 15 ° С, and at night - from + 16 ° С to + 14 ° С. Starting from the 2-week age of seedlings, the set temperature is maintained with a gradual tightening of environmental conditions, up to the removal of seedlings on the street for hardening.
- If the weather is sunny, the room is ventilated, avoiding a draft: the windows are opened first for 15 minutes a day, and then gradually increase this time to 2–4 hours.
- For 1–2 weeks (no more) before the seedlings are planted in the soil, the air temperature in the room should decrease (at night) to + 12 ° С.
- In the afternoon, containers with young plants need to be taken out for a short time to fresh air, at first leaving them for a half-hour stay on the street, and then you can gradually increase the time. It is possible to harden plants on the street already at an air temperature of + 12 ... + 14 ° C.

Planting seedlings in open ground
Since Nepas tomatoes are considered to be ripe, seedlings will be ready for planting in open ground after 60–65 days from the time of sowing seeds. It is also important to take into account weather conditions, but landing must be done no later than May 20–25. If there is a threat of spring frosts, the planted plants must be covered with covering materials (spanbond, film or other). Seedlings are planted on a bed only in cloudy weather or in the evening. These precautions are needed so that the plants can take root a little during the night before they get caught in the sun during the day.
Since the Nepas tomato variety has compact bushes, the tape method is best for planting seedlings:
- Dig trenches of the desired length and 80 cm wide.
- In trenches, holes are made in the depths of a shovel bayonet at a distance of 40 cm from each other.
- Each trench is located 150 cm from the previous one.
- Before planting seedlings, the wells are poured with water and left until completely absorbed into the ground.
- Before planting, seedlings are abundantly watered so that it can be easily removed from containers.
- Tomatoes are immersed in a hole in 1 plant, carefully sprinkling the roots with soil mixed with compost, and then completely filling the entire hole and carefully tamping the soil.
- After planting seedlings, it is abundantly watered.

Growing Features
Although the tomatoes of the varietal group Nepas are considered unpretentious, some features must be taken into account when growing them.
Watering
In the first time after planting seedlings, it should be watered with warm (room temperature), settled water. Young bushes should be watered only under the root, trying not to fall on the foliage of plants. Such irrigation will provide moisture to the main root system, which is located at a depth of about 40 cm. In the future, the bushes can be watered with water, somewhat cooler than room temperature. Watering tomato stands should be done regularly - at least 1 time in 4–5 days.
Did you know? Tomatoes can work in stressful situations as a sedative or antidepressant, because they contain antineuric vitamin (B1), as well as serotonin, which is considered a hormone of happiness.
Top dressing
Top dressing is done in several stages and depends on the period of development of the bushes:
- In the period of the appearance of buds. During the budding of tomatoes, yeast nutrition will be useful to them: 1 tbsp. dry yeast diluted in 10 liters of water, pour 3 tbsp. sugar and let stand for 2 hours. Dilute the mixture with water (1:10) and water the plants under the root. With this top dressing, ash is simultaneously introduced.
- During fruiting.In order for the fruits to ripen faster and improve their taste, you can feed the plants with the following nutrient solutions (optional): dilute 1 tbsp. In 10 l of water. Nitrofoski and 1 tsp. dry sodium humate or in a bucket of water dissolve 2 tbsp. superphosphate and 1 tbsp. liquid sodium humate. Both solutions are poured under the roots of the bushes at the rate of 5 liters per 1 m².

Stepson
Although a small number of stepchildren form in non-deserving tomato varieties and their bushes do not grow very much in order to accelerate the appearance and ripening of the largest tomatoes, they are also recommended to be stepson.
A few stepchildren of the considered varieties can grow within a few days after planting bushes in the garden, so you need to regularly check the bushes for every newly appeared leaf of new shoots in the axils, which are recommended to break off at the beginning of development (up to 3 cm), leaving a “stump” 0.5 cm. This will ensure that no stepson is formed in this place.
Soil care
When seedlings have already been planted, the following care is required for the soil in the garden:
- Weed removal and loosening. After each watering (the next day), it is necessary to loosen the ground near the plants, while destroying the grown weeds. First, the earth is carefully loosened to a depth of 12 cm, which allows the top layer of the earth to warm up well and be saturated with oxygen. With further rooting of the plants, the soil loosens no more than 5 cm. Loosening is repeated every 14 days.
- Hilling. The procedure is especially necessary when adventitious roots appear on stems near the soil. When hilling tomatoes, the soil is enriched with oxygen, the main stem is strengthened, and also the development of an additional root volume is stimulated. Culture requires hilling up to 3 times during the growing season.
- Mulching the soil. To reduce watering and accelerate the ripening of tomatoes, the bushes are mulched by folding between rows of peat crumbs, straw, sawdust or cut weed grasses.

Bush tying
Non-deserving varieties are usually not tied, as the plants have a dense main shoot that holds the whole plant well. But in order to provide free access to the bush during trimming of stepchildren or picking fruits, or to provide the necessary ventilation and a sufficient amount of lighting to the whole bush, its garter is recommended.
Apply several options how to tie up a tomato crop:Did you know? So that the collected green tomatoes can ripen faster, they are placed near apples or already ripened tomatoes. In the early ripening, the release of ethylene from ripe fruits helps them. — gas, creating favorable conditions for accelerated ripening.
- To the pegs. The first garter is carried out with a plant growth of 40 cm. For this, you can use wooden devices made of plastic or metal. Each bush is tied to a separate peg. Its height should be approximately 35–40 cm greater than the height of the bush (taking into account the part of the peg that is driven into the ground).Having fixed the peg in the ground, the main shoot is wrapped with eight textile tape and tied to a support. Large branches with fruits are also attached to the support in order to avoid breaking off under their weight. When the bush grows, the garter repeats.

- To the trellis. Stakes are driven along the bed onto which rows of wire or braid are pulled in parallel order at a distance of 25–35 cm, into which tomato bushes are woven as they grow. Branches with tomatoes are fixed to the trellis with pieces of tape.
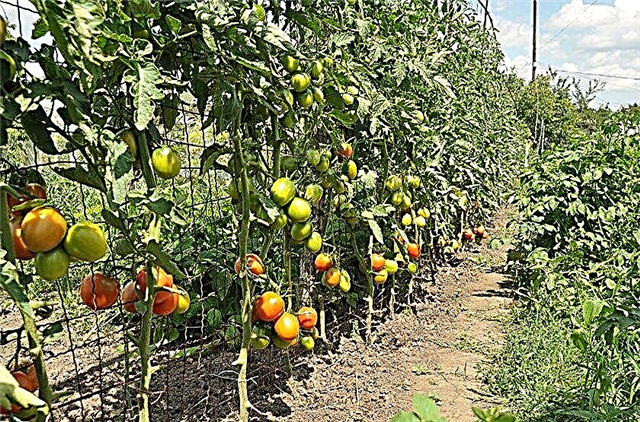
- Linear Garter. A wooden thin beam is installed or on both sides of the beds there are columns on which the wire is pulled at a height of 1 m above the ground. Then take a piece of twine and tie it with one end to the wire, and the second is attached to the trunk of the plant. As the plants grow, its stem is wrapped in other stripes and wound around the main strip. The bushes look compact, and the entire structure resembles a hut.

Preventative treatment
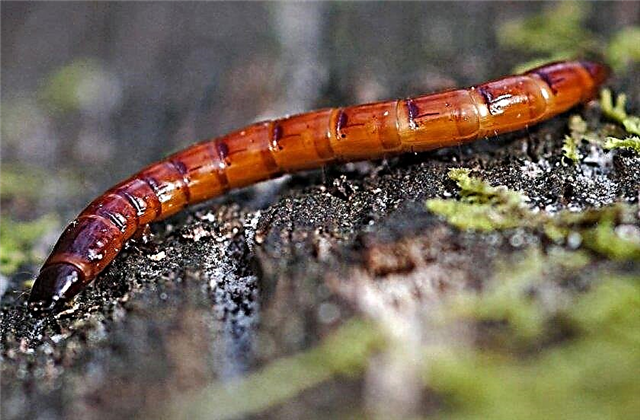
Non-deserving hybrids of Nepas are little affected by common diseases and pests of tomatoes. But if errors in care and violations of the rules of agricultural technology are allowed, then the culture can be affected by late blight, spider mites or wireworms.
To prevent these problems, preventative treatment of plants is necessary:- From late blight. Since the disease also affects potato stands, tomato bushes should not be planted next to potato beds for prevention. It is also necessary to comply with crop rotation rules and fertilize with phosphorus-potassium fertilizer. It is recommended that young plants be sprayed 3 weeks after planting with Barrier, and after another 7 days with Barrier. After, with a weekly interval, the tomatoes are treated with Oksikhom twice (all means are used according to the instructions).

- From a spider mite. It is necessary to prevent the spraying of bushes with infusion of garlic and dandelion leaves with the addition of liquid soap.

- From the wireworm. 3 days before planting tomato seedlings, a pest bait is laid in the ground: carrots, beets or potatoes (slices) are strung on wooden sticks (20 cm), after which the bait is buried on the beds. Before planting seedlings of pests destroyed. Tomatoes can be protected from wireworm by Bazudin or liming acidic soil.
As you can see, the variety group Nepas can be called a special kind of tomato. They have proven themselves as plants that are resistant to harsh environmental conditions, so their unpretentiousness and high yield of fruits have made them profitable for growing for commercial purposes.


